
Keeping your NVIDIA GPU clean is essential for maintaining optimal performance, cooling efficiency, and long-term hardware lifespan. Dust accumulation is a common issue in desktop PCs, especially in areas with poor ventilation or high environmental dust levels. Over time, this buildup can clog fans, block heatsinks, and increase GPU temperatures, which can lead to thermal throttling or even permanent damage. In this article, we explain how to safely clean dust from your NVIDIA graphics card, while sharing essential tools, precautions, and tips to ensure the process is effective and risk-free.
Why Cleaning Your NVIDIA GPU Matters?
Dust accumulation on your NVIDIA GPU can significantly impact its performance. Dust may seem harmless, but when it collects on your GPU’s heatsink or fan blades, it reduces cooling performance, forcing your GPU to work harder. This results in higher temperatures, increased fan noise, and possibly shortened component lifespan. High temperatures can reduce the efficiency of your graphics card, leading to lower frame rates in games, slower rendering times, or even system crashes.
Regularly cleaning your GPU—ideally every 6 to 12 months—helps maintain optimal cooling, prevents thermal throttling, and ensures consistent performance. For gamers, content creators, or professionals using NVIDIA GPUs like the RTX 3080 or 4090, keeping the card dust-free is critical for longevity and reliability.
Tools You’ll Need for Safe GPU Cleaning
Before starting, gather the following tools:
- Compressed air can (with a narrow nozzle)
- Soft anti-static brush (or small paintbrush)
- Phillips screwdriver (if you plan to disassemble)
- Anti-static wrist strap (for ESD protection)
- Isopropyl alcohol (90%+) and lint-free cloth (for deep cleaning)
⚠️ Important: Always shut down your PC, unplug the power supply, and ground yourself to avoid static electricity damage before touching any internal components.
Step-by-Step: How to Clean Dust from an NVIDIA GPU?
1. Power Off and Disconnect the GPU
Start by turning off your PC, unplugging it from the wall, and letting it cool down. Remove the side panel of your PC case and carefully disconnect the power cables from the GPU. Unscrew and gently pull the graphics card from the PCIe slot.
2. Use Compressed Air to Blow Out Loose Dust
Take the GPU outside or to a well-ventilated area. Hold the compressed air can upright, and spray short controlled bursts at the GPU’s heatsinks, fan blades, and ventilation ports. Avoid spinning the fans too fast as this could damage the bearings.
3. Brush Off Stubborn Dust
If there is caked dust that air won’t remove, use a soft anti-static brush to gently dislodge it, especially around the fan hub, heatsink fins, and PCB edges. Do not press too hard to avoid damaging delicate parts.
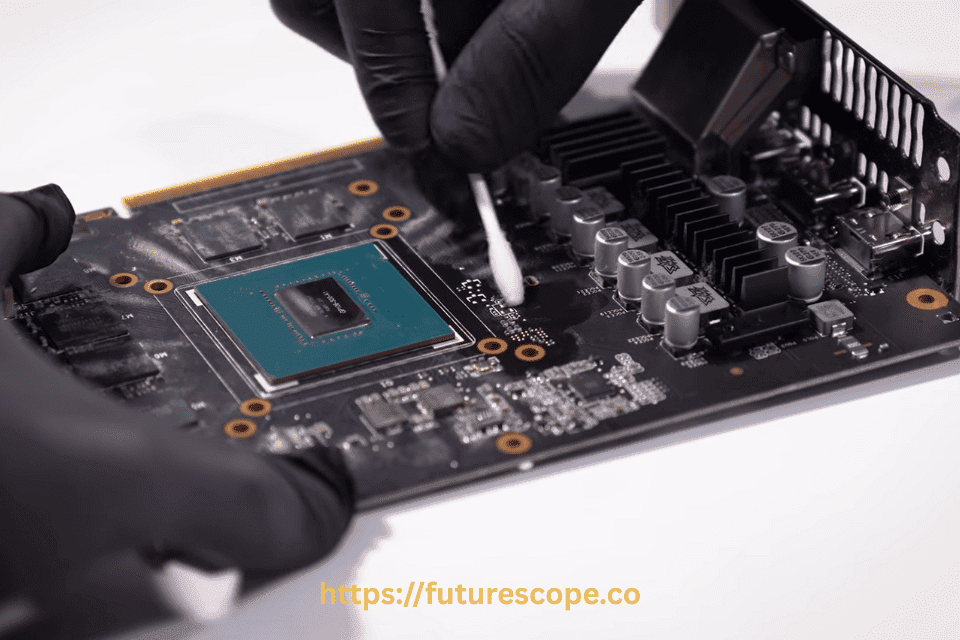
4. Optional: Disassemble for Deep Cleaning
For deeper cleaning (if your GPU is very dusty), you can unscrew the shroud and heatsink. Use isopropyl alcohol and a lint-free cloth to clean the metal fins and GPU die gently. This step is only recommended if you’re comfortable with hardware disassembly, as it may void your warranty.
5. Reassemble and Reinstall
Once the GPU is dust-free and dry, carefully reassemble the shroud (if disassembled), reinstall the GPU into the PCIe slot, reconnect power cables, and boot up your PC.
Safety Tips for Cleaning Your NVIDIA GPU
To avoid damaging your NVIDIA GPU, follow these precautions. Never clean the GPU while it’s powered on or connected to the system. Avoid using household cleaning products, water, or damp cloths, as they can cause corrosion or short circuits. When using compressed air, hold the fans in place to prevent them from spinning too fast, which could damage the bearings. If you’re uncomfortable disassembling your PC or handling the GPU, consult a professional technician to avoid voiding warranties or causing accidental damage.
When to Seek Professional Help?
If your NVIDIA GPU shows signs of overheating even after cleaning, such as consistently high temperatures (above 85°C under load) or unusual fan noise, it may require professional attention. Dust deep within the heatsink or degraded thermal paste could be the culprit. Additionally, if you’re unsure about disassembling the GPU or reapplying thermal paste, a certified technician can perform a thorough cleaning and maintenance check to ensure your card operates at peak performance.
Pro Tips for Safety
- Avoid Vacuums: They generate static electricity that can fry components.
- Never Use Water or Harsh Chemicals: Isopropyl alcohol evaporates quickly and is safe for electronics.
- Check Warranty: Some NVIDIA GPUs have warranty seals on screws; disassembling may void coverage.
Long-Term Maintenance
Improve airflow in your case with dust filters, maintain a clean environment, and schedule regular cleanings. For liquid-cooled GPUs, ensure radiators are dust-free.
By following these steps, you’ll protect your NVIDIA GPU from dust-related issues, ensuring it delivers smooth frame rates and stays cool under pressure. A little maintenance goes a long way in preserving your investment!
Final Thoughts: Keeping Your NVIDIA GPU Dust-Free
Cleaning your NVIDIA GPU regularly is a simple yet critical part of PC maintenance that ensures reliable performance and cooler operating temperatures. Whether you’re gaming, editing, or mining, keeping dust at bay helps prevent thermal throttling and extends the life of your investment. Always prioritize safety by using the right tools and following anti-static precautions. A clean GPU not only runs better—it also stays quieter and more efficient.


![How to Fix YouTube Server Connection Error [400] on Android](https://www.futurescope.co/wp-content/uploads/2021/09/How-to-Fix-YouTube-Server-Connection-Error-400-on-Android-150x150.png)


This guide was a lifesaver! I’ve always been nervous about damaging my GPU while cleaning, but your step-by-step instructions made it easy and safe. I finally cleaned out months of dust without a problem. Thanks!
That’s awesome to hear! It’s totally normal to feel a bit nervous the first time, but we’re glad the guide gave you the confidence to do it safely. Keeping your GPU dust-free can really improve performance and longevity. Appreciate you taking the time to leave feedback!