
Setting up a proxy sounds like it should be one universal process, until you actually try it and discover that Chrome, Firefox, and Edge each handle it differently. Some browsers hand the job off to your operating system. Others manage it internally. And when you throw an authenticated proxy like ProxyEmpire into the mix, username and password included, the whole thing gets a little more complicated than a simple settings toggle.
This guide walks through exactly how to configure ProxyEmpire in browser settings, covering the native method and the extension method, plus dedicated walkthroughs for Chrome, Firefox, and Edge specifically, so you can pick whichever fits how you actually work.
Why Browser-Level Proxy Setup Isn’t One-Size-Fits-All?
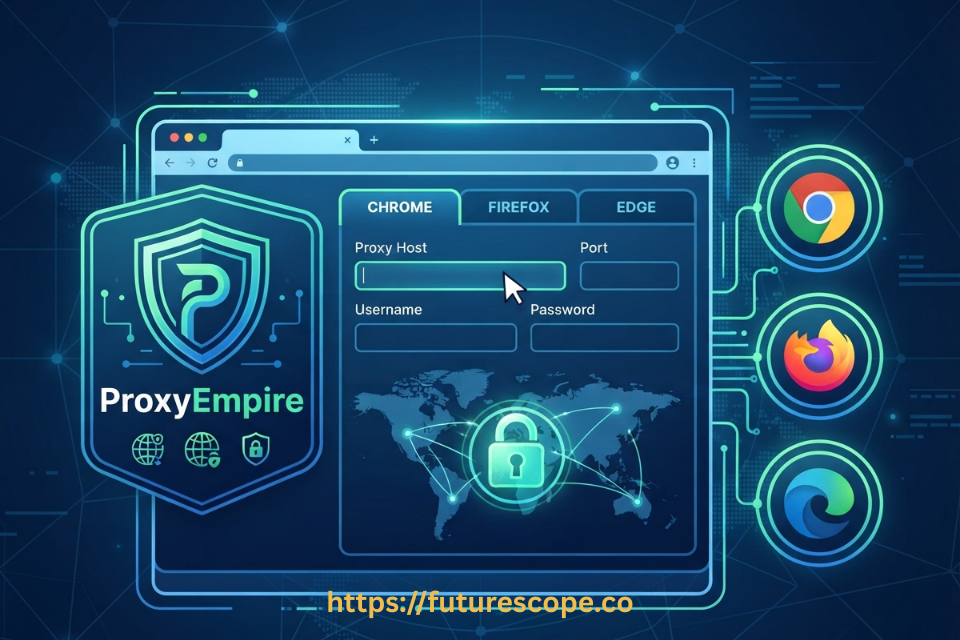
Chrome and Edge, both built on the Chromium engine, don’t have their own independent proxy settings. Instead, they borrow whatever proxy configuration is set at the operating system level. When a proxy requires a username and password, these browsers don’t have a field to save that information, so they simply throw up a login pop-up every time authentication is needed.
Firefox works differently. It maintains its own proxy settings completely separate from the operating system, and when it hits an authenticated proxy for the first time, it prompts for credentials and gives you the option to save them using the browser’s built-in password manager.
That difference matters a lot once you’re using a persistent, authenticated proxy service like ProxyEmpire rather than a quick, one-off connection.
What You’ll Need Before You Start
- An active ProxyEmpire plan — You’ll need this to generate the host, port, username, and password for whichever proxy type you’re setting up.
- The browser you want to configure — Chrome, Firefox, or Edge, whichever you’re configuring, or all three if you’re setting up more than one.
- Administrator access to your device — Access to your operating system’s network settings, since Chrome and Edge both route through there.
Two Ways to Configure ProxyEmpire in Any Browser
Before diving into browser-specific steps, it’s worth understanding the two general approaches, since they apply across Chrome, Firefox, and Edge alike.
- Native operating system or browser settings — Works in every browser, doesn’t require installing anything extra, but for authenticated proxies like ProxyEmpire, Chrome and Edge will prompt for credentials repeatedly rather than remembering them.
- A dedicated proxy extension — A browser extension like FoxyProxy or Proxy SwitchyOmega, which lets you save your ProxyEmpire username and password directly, switch proxies with one click, and avoid the repeated login prompts entirely.
For quick testing, native settings are fine. For daily, ongoing use of an authenticated ProxyEmpire connection, an extension is almost always the smoother experience, and we’ll cover both paths for each browser below.
How to Use ProxyEmpire with Chrome?
Since Chrome pulls its proxy configuration from your operating system, setup happens outside the browser itself.
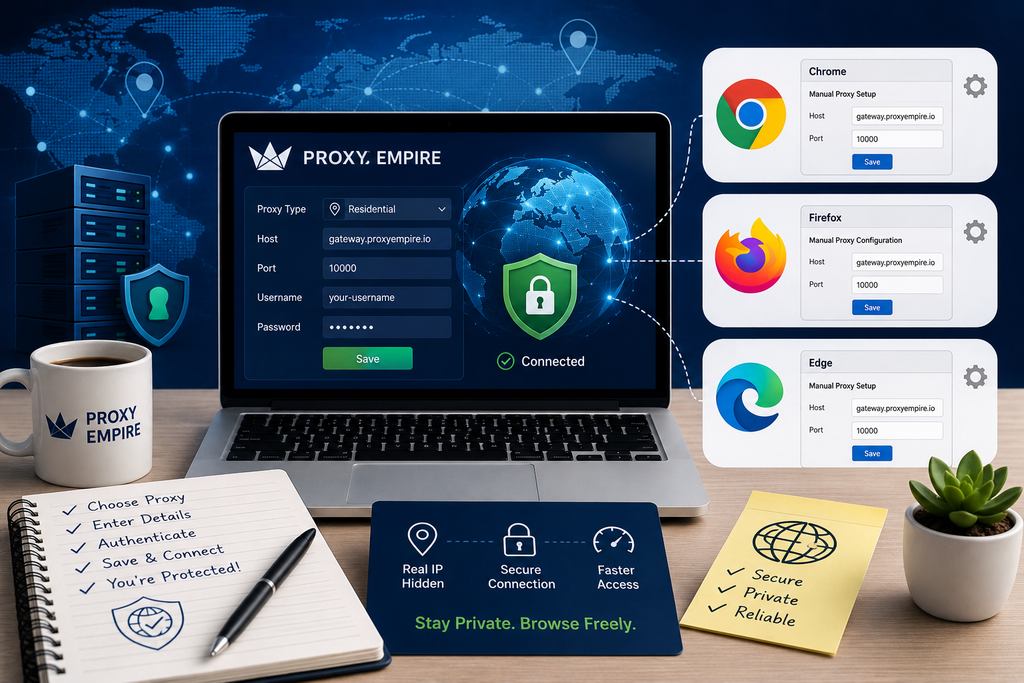
- Generate your ProxyEmpire proxy. Log into your ProxyEmpire dashboard, select a proxy type, and configure your targeting to generate a host, port, username, and password.
- Open Chrome’s proxy settings. Type chrome://settings/system into the address bar and click Open your computer’s proxy settings, which hands off to your operating system’s network panel.
- Enter your ProxyEmpire host and port. On Windows, enable Manual proxy setup and enter your ProxyEmpire host and port. On macOS, go to Network, select your connection, click Details, then Proxies, and enter the same details under the matching protocol.
- Save and restart Chrome. Save your settings and restart Chrome. The first time it needs to authenticate, a pop-up will ask for your ProxyEmpire username and password.
Because Chrome doesn’t store these credentials permanently, you’ll see that authentication pop-up again periodically. If that’s more friction than you want for daily use, installing a proxy extension like FoxyProxy lets you save your ProxyEmpire credentials directly, switch proxies from the toolbar, and skip the repeated prompts entirely.
How to Set Up ProxyEmpire in Firefox?
Firefox is the most self-contained of the three, since it manages proxy settings internally rather than deferring to your operating system.
- Generate your ProxyEmpire proxy. Log into your ProxyEmpire dashboard, select your proxy type, and copy the host, port, username, and password.
- Open Firefox’s Network Settings. Click the menu icon in the top right, select Settings, then General, and scroll down to Network Settings.
- Select Manual proxy configuration. Choose Manual proxy configuration, then enter your ProxyEmpire host and port in the HTTP Proxy field. Check the box for Also use this proxy for HTTPS, or enter the same details separately under SOCKS Host if you’re using a SOCKS5 connection.
- Save your settings. Click OK to save. The next time Firefox loads a page through the proxy, it will prompt you for your ProxyEmpire username and password.
- Save your credentials when prompted. When the credential prompt appears, enter your ProxyEmpire username and password, and check the option to save them in Firefox’s password manager so you’re not asked again every session.
This built-in credential saving is a genuine advantage Firefox has over Chrome and Edge for authenticated proxies, since you can get a persistent, low-friction ProxyEmpire connection without installing anything extra.
How to Configure ProxyEmpire in Edge?
Since Edge is also built on Chromium, its setup closely mirrors Chrome, pulling proxy settings from the same Windows system configuration.
- Generate your ProxyEmpire proxy. Log into your ProxyEmpire dashboard, select a proxy type, and copy the host, port, username, and password.
- Open Edge’s proxy settings. Type edge://settings/system into the address bar, or go to Windows Settings, then Network & Internet, then Proxy.
- Enter your ProxyEmpire details. Toggle on Use a proxy server, enter your ProxyEmpire host in the Address field and the port in the Port field, then click Save.
- Restart Edge. Restart Edge for the new proxy settings to take effect.
- Authenticate when prompted. The first time authentication is required, Edge will prompt you for your ProxyEmpire username and password, similar to Chrome’s behavior.
Just like Chrome, Edge doesn’t retain these credentials permanently between prompts. If you’re using ProxyEmpire in Edge regularly, a proxy extension is worth installing for the same reason it helps in Chrome, saved credentials and one-click switching without repeated login pop-ups.
Start With ProxyEmpire and Scale When You Need To, Explore ProxyEmpire Proxies
Get Reliable Proxies With ProxyEmpire
If ProxyEmpire looks like a good fit, check the current plans and start with the option that suits your traffic needs.
Using a Proxy Extension for a Smoother Setup
If you’re configuring ProxyEmpire in Chrome or Edge and want to avoid the repeated authentication pop-up, a dedicated proxy extension solves it cleanly.
- Install a proxy extension. Install a proxy management extension such as FoxyProxy or Proxy SwitchyOmega from your browser’s extension store.
- Create a new proxy profile. Open the extension’s options and create a new profile, giving it a name like ProxyEmpire Residential or ProxyEmpire Mobile to keep things organized.
- Enter your ProxyEmpire connection details. Select HTTP or SOCKS5 to match your ProxyEmpire credentials, then enter the host and port.
- Add your username and password. Most proxy extensions include a dedicated authentication field, often behind a small lock icon, where you can enter your ProxyEmpire username and password directly.
- Activate the profile. Click the extension icon in your toolbar and select your new ProxyEmpire profile to activate it instantly, without touching your operating system’s settings again.
Which ProxyEmpire Proxy Type Works Best at the Browser Level?
- Rotating residential proxies — A solid default for general browsing, scraping, and research tasks, since a large, rotating pool of real ISP-assigned IPs blends into normal traffic.
- Static residential (ISP) proxies — Better suited to tasks that need a consistent identity over time, such as staying logged into the same account across multiple sessions.
- Mobile proxies — Worth considering if your browsing needs to reflect a mobile-specific location or network.
- Datacenter proxies — A reasonable, budget-friendly choice for simple, low-sensitivity browsing tasks that don’t require strong anonymity.
Verifying Your Setup Actually Works
Once your proxy is configured, whichever browser and method you used, visit an IP-checking website and confirm the displayed IP address and location match your ProxyEmpire configuration rather than your real network connection. This quick check takes seconds and confirms your traffic is actually routing through ProxyEmpire before you rely on it for anything important.
Also Check: How to Integrate ProxyEmpire with Any Anti-Detect Browser
Troubleshooting Common Browser Proxy Issues
The Authentication Pop-Up Keeps Reappearing
This is expected behavior in Chrome and Edge for authenticated proxies, since neither browser saves credentials natively. Switching to a proxy extension is the most reliable fix.
The Browser Shows a Connection Error
Double-check the host and port entered in your operating system or browser settings against your ProxyEmpire dashboard, since a typo here is the most common cause.
The Proxy Works but the Location Looks Wrong
Revisit your targeting filters in the ProxyEmpire dashboard, since your credentials are tied to whatever country, region, or city was selected when you generated them.
Firefox Won’t Save My Credentials
Make sure you’re checking the save option when the credential prompt appears, and confirm Firefox’s built-in password manager is enabled in Settings under Privacy & Security.
Need Proxies? Try ProxyEmpire Today!
Try ProxyEmpire for $1.97
Curious whether ProxyEmpire is worth it? Try it yourself and see how it performs for your use case.
Final Thoughts
Learning how to configure ProxyEmpire in browser settings really comes down to understanding how each browser handles authentication. Firefox saves your credentials natively, making it the simplest path for ongoing use. Chrome and Edge both defer to your operating system and re-prompt for credentials, which makes a proxy extension the more practical choice if you’re using ProxyEmpire daily rather than for a quick test.
Frequently Asked Questions
1. Why does Chrome keep asking for my ProxyEmpire username and password?
Chrome doesn’t have a built-in field to save proxy credentials, so it prompts for authentication periodically. Installing a proxy extension like FoxyProxy lets you save your ProxyEmpire login and skip the repeated pop-ups.
2. Is Firefox easier to configure with ProxyEmpire than Chrome or Edge?
In terms of ongoing convenience, yes. Firefox manages its own proxy settings and can save your ProxyEmpire credentials in its built-in password manager, while Chrome and Edge both re-prompt since they rely on the operating system’s proxy handling.
3. Do I need a browser extension to use ProxyEmpire in Edge?
Not strictly, native Windows system settings work fine for basic use. But if you’re using ProxyEmpire in Edge regularly, an extension avoids the repeated authentication pop-ups that come with the native method.
4. Which ProxyEmpire proxy type should I use for regular browsing?
Rotating residential proxies are a solid default for general browsing and research, while static residential proxies work better if you need to stay logged into the same account consistently over time.
5. How do I confirm ProxyEmpire is actually working in my browser?
Visit an IP-checking website after configuring your proxy and confirm the displayed IP and location match your ProxyEmpire dashboard settings rather than your real network connection.
Ready to Get Configured?
You now know exactly how to configure ProxyEmpire in Chrome, Firefox, and Edge, including the native method for each and when a proxy extension makes life easier. Grab your ProxyEmpire credentials from your dashboard, pick the browser and method that fits your workflow, and verify the connection before you rely on it. Go configure your first ProxyEmpire proxy in your browser today and start browsing with the location and identity you actually need. Try ProxyEmpire ->