

Creating engaging, well-structured blog posts takes time and effort. Many writers struggle to balance creativity, SEO, and consistency. That’s where AI-powered tools like Blogify.Ai come in. This platform is designed to make content creation faster, easier, and more effective. Whether you are a beginner blogger or an experienced content marketer, Blogify.Ai can help you write posts that rank on search engines and keep readers engaged.
In this step-by-step guide, we will walk through exactly how to write blog posts using Blogify.Ai. You’ll learn how the platform works, how to optimize your writing, and what features make it a must-have tool for modern blogging.
What is Blogify.Ai?
Blogify.Ai is an AI-powered content creation platform that helps writers and businesses generate SEO-friendly articles, blog posts, and marketing copy. It uses artificial intelligence to understand your topic, research keywords, and produce structured content that aligns with Google’s search ranking requirements.
Unlike basic AI text generators, Blogify.Ai focuses specifically on blogging workflows. It provides templates, outlines, keyword suggestions, and formatting tools to ensure your post looks professional and performs well online.
Step-by-Step Guide to Writing Blog Posts With Blogify.Ai
Now, let’s break down the process of creating a blog post from start to finish using Blogify.Ai.
Step 1: Sign Up and Log In
The first step is to create an account on Blogify.Ai. Once you sign up, log in to access your dashboard. The dashboard is where you will manage all your writing projects. It usually provides shortcuts to start a new blog, check drafts, or explore templates.
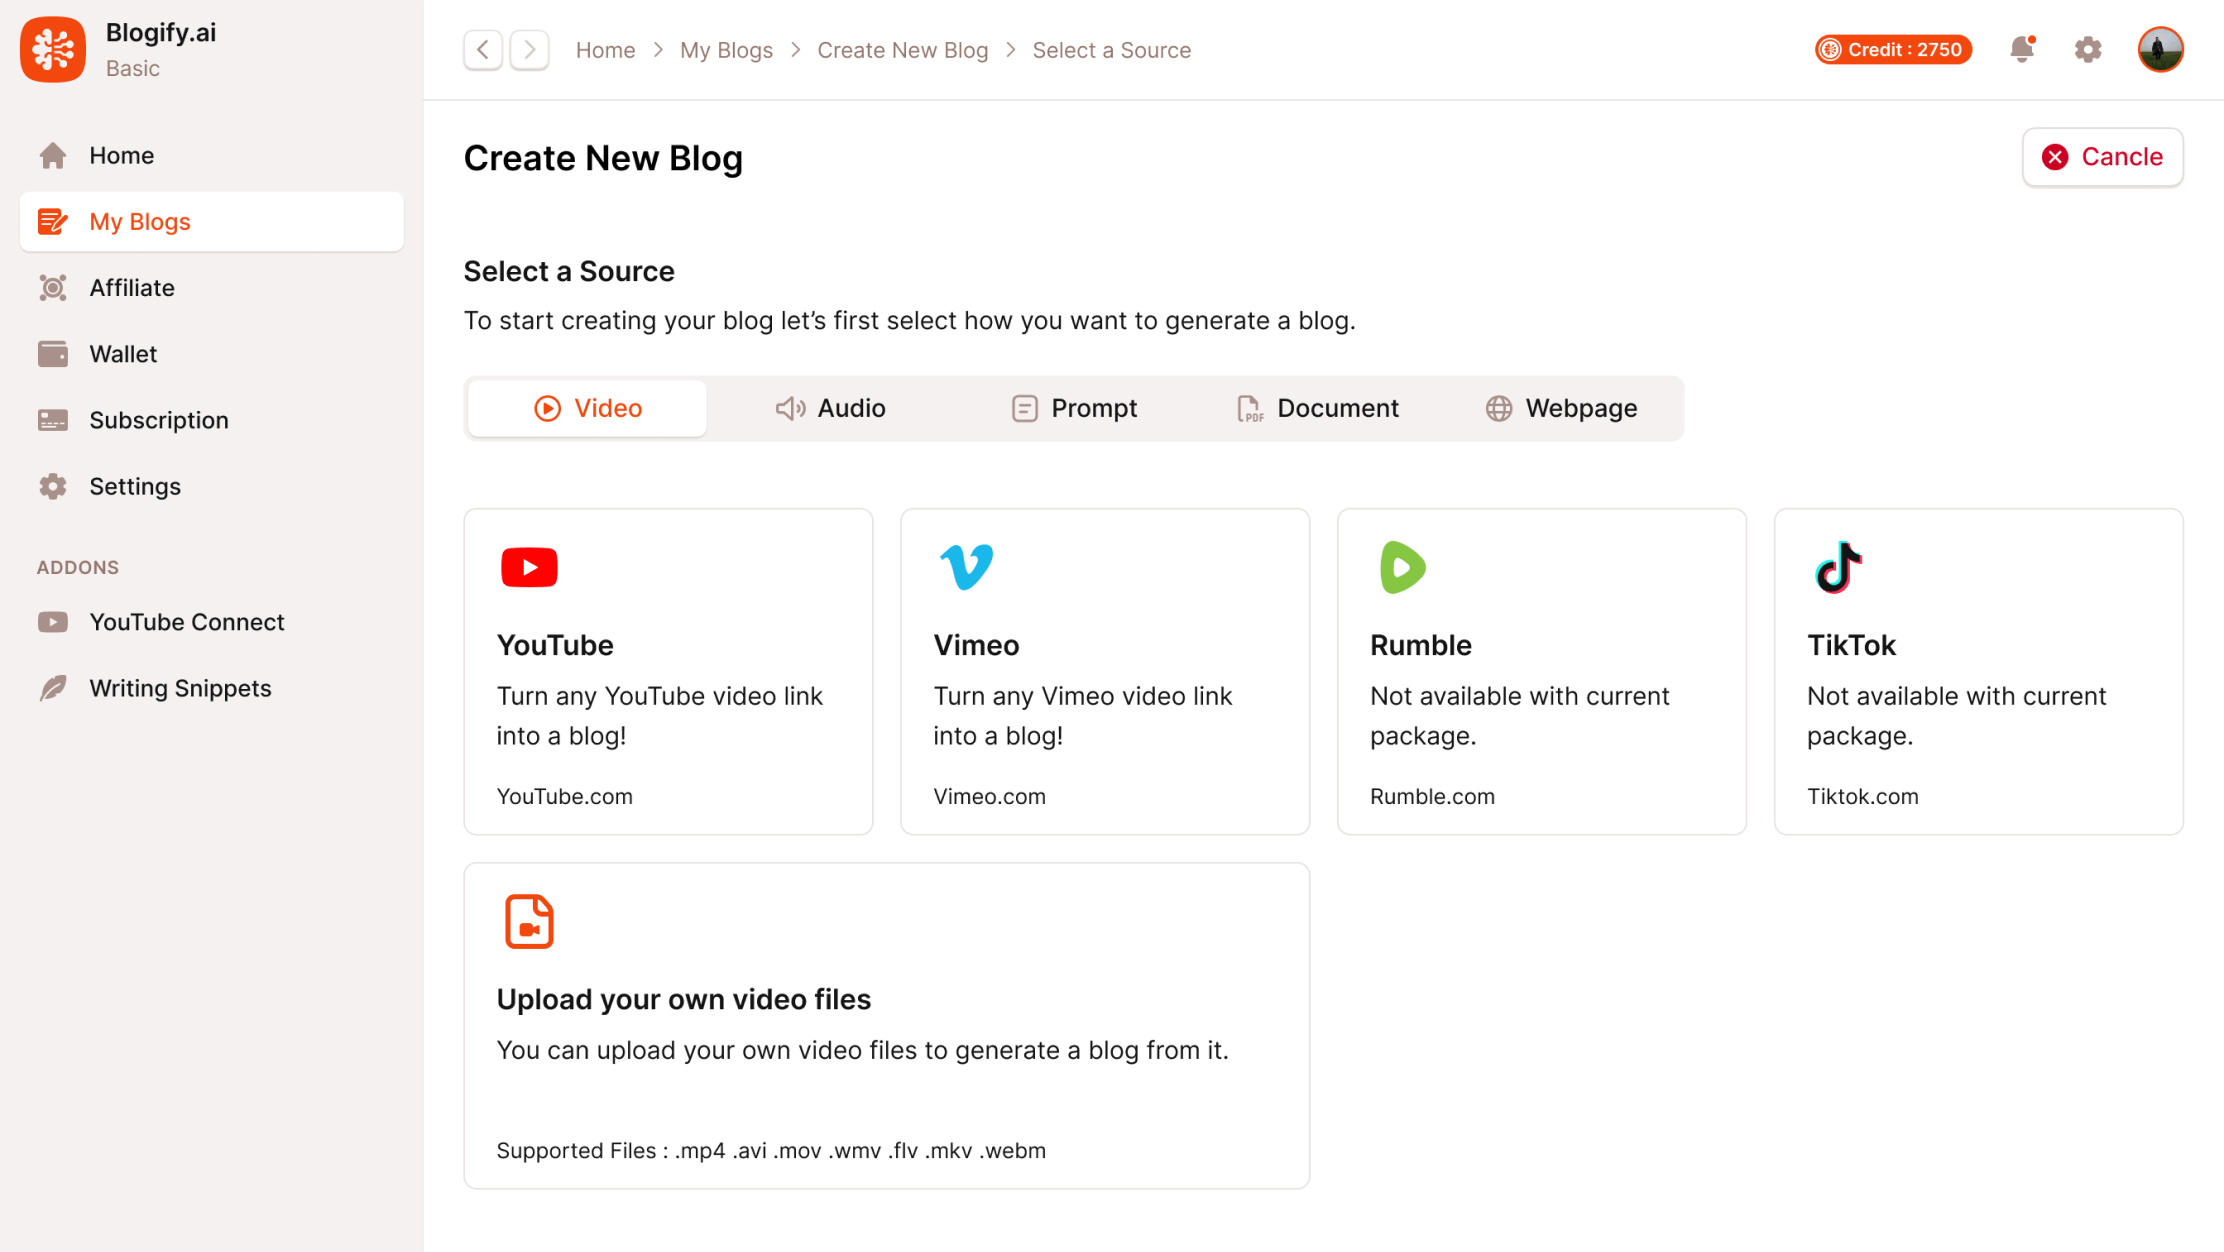
Step 2: Choose Your Blog Post Type
Blogify.Ai offers different types of blog post templates such as:
- How-to Guides
- Listicles (Top 10, Top 5)
- News-style Blogs
- Product Reviews
- Case Studies
Choosing the right format is important because it determines how your post will be structured. For example, if you’re writing a tutorial, the How-to Guide template is the best option.
Step 3: Enter Your Topic or Keyword
Next, you’ll need to enter the main topic or focus keyword of your blog. For example, if you want to write about “digital marketing tools,” type that into the topic field.
Blogify.Ai’s AI system will then generate a list of subtopics, relevant keywords, and possible blog structures. This saves you time on brainstorming and ensures that your article covers what readers are searching for.
Step 4: Generate an Outline
Once you enter your keyword, Blogify.Ai creates a detailed outline for your blog post. The outline usually includes:
- Introduction
- Main sections with subheadings
- Key points under each section
- Conclusion
At this stage, you can customize the outline. Add or remove sections depending on what you want to cover. This step is crucial because it sets the flow of your article.
Step 5: Customize Tone and Style
Blogify.Ai allows you to adjust the tone and writing style of your blog. You can select from options like:
- Professional
- Conversational
- Educational
- Persuasive
- Friendly
If your blog is targeting professionals, you may want a more formal tone. If your audience is beginners, a conversational and simple style works best.
Step 6: Generate the Draft
After finalizing the outline and tone, click on the “Generate Draft” button. Within seconds, Blogify.Ai creates a complete blog post based on your input.
The draft will include:
- Well-structured paragraphs
- Keyword placement
- Headings and subheadings (H2, H3 tags)
- Meta title and description suggestions

Step 7: Edit and Refine
Even though Blogify.Ai generates high-quality content, it’s always best to review and edit the draft. Here’s what to check:
- Accuracy: Verify facts, stats, and examples.
- Clarity: Ensure sentences are easy to read.
- Personal Touch: Add your own experience, case studies, or examples.
- Internal Linking: Insert links to other relevant posts on your website.
This editing step makes your blog feel unique and authentic.
Step 8: Optimize for SEO
Blogify.Ai also provides SEO recommendations to boost your ranking. You should focus on:
- Keyword Placement: Ensure your primary keyword appears in the title, meta description, introduction, and throughout the text.
- Meta Tags: Use Blogify.Ai’s suggestions or customize them.
- Readability: Break down long paragraphs, use bullet points, and add transition words.
- Alt Text for Images: Add descriptive alt text to all images.
- URL Structure: Keep it short, clear, and keyword-rich.
By following these tips, your blog post will be more search engine–friendly.
Step 9: Add Visuals and Media
A blog post with only text may not hold readers’ attention. Blogify.Ai allows you to insert images, infographics, or even embedded videos. Visual content not only improves engagement but also increases your chances of ranking in Google Images.
Step 10: Publish and Promote
After editing and optimizing, export your blog post to WordPress or your content management system. Blogify.Ai usually allows direct publishing or easy copy-paste formatting.
Once live, promote your post through:
- Social media platforms (Facebook, Twitter, LinkedIn)
- Email newsletters
- SEO-driven link-building strategies
This ensures your blog reaches the widest audience possible.
Ready to take your blogging to the next level?
With Blogify.Ai, you can create SEO-friendly blog posts in minutes, save time, and grow your traffic faster.
Don’t wait—start writing smarter today with Blogify.Ai!
Why Use Blogify.Ai for Blogging?
Before diving into the steps, let’s quickly look at why Blogify.Ai stands out:
- Saves Time: You can create blog posts in minutes instead of hours.
- SEO-Friendly: Built-in keyword optimization and meta tag generation.
- Customizable: Adjust tone, length, and style to fit your audience.
- Beginner-Friendly: No technical or advanced writing skills required.
- Consistency: Helps you publish regularly with less effort.
Tips for Maximizing Blogify.Ai’s Potential
To get the most out of Blogify.Ai, start with broad topics and use the platform’s keyword suggestions to refine your focus, ensuring alignment with search intent. Regularly review AI-generated drafts for originality, adding personal insights to differentiate your content. Leverage the multilingual support to create posts in over 150 languages, targeting global audiences, and use analytics to monitor which posts resonate most.
Combine Blogify.Ai with tools like Google Analytics for deeper performance insights or SEMrush for keyword research to supercharge your SEO strategy. By following these steps, you’ll create high-quality, SEO-optimized blog posts in under 15 minutes, positioning your brand for success in 2025’s digital landscape.
more to read, Blogify.Ai Content Generation Tips
Frequently Asked Questions
What is Blogify.Ai used for?
Blogify.Ai is used to generate SEO-optimized blog posts, articles, and marketing content. It helps bloggers and businesses save time, maintain consistency, and improve search engine rankings.
Can I fully rely on Blogify.Ai to write my blogs?
Blogify.Ai creates high-quality drafts, but it’s best to edit and add your personal touch. Fact-checking and customization make your content unique and trustworthy.
Is Blogify.Ai beginner-friendly?
Yes, Blogify.Ai is designed for beginners as well as professionals. Its simple interface and templates make it easy to create content even without advanced writing skills.
Does Blogify.Ai help with SEO?
Absolutely. Blogify.Ai provides keyword suggestions, meta descriptions, headings, and content structure that are optimized for SEO, making it easier for your blog to rank higher on search engines.
Can I publish directly to WordPress from Blogify.Ai?
Yes, many versions of Blogify.Ai allow direct publishing or easy export to WordPress and other CMS platforms, making the process seamless.
How do I make Blogify.Ai-generated content unique?
You can add personal experiences, case studies, images, internal links, and examples. Editing the draft with your voice ensures the content stands out.
How Does Blogify.ai Work?
Blogify. Ai generates content ideas and structures based on your input. It simplifies the writing process.
Is Blogify.ai Suitable For Beginners?
Yes, it is beginner-friendly. Its intuitive interface helps new users write effective blog posts.
Can Blogify.ai Improve My Writing?
Yes, it provides suggestions and tips. This helps enhance your writing quality and engagement.
What Are The Benefits Of Using Blogify.ai?
It saves time and effort. Plus, it offers unique content ideas and writing assistance.
Conclusion
Writing blog posts doesn’t have to be overwhelming. With Blogify.Ai, you can create high-quality, SEO-optimized articles in just a few steps. From choosing a template and generating outlines to editing and publishing, the process is streamlined and efficient.
This AI-powered tool is ideal for bloggers, marketers, and businesses who want to save time while maintaining professional-quality content. By combining Blogify.Ai’s automation with your personal creativity, you can consistently publish blogs that rank well and attract loyal readers.
Writing becomes easier with each post.